Introduction
Dreaming of digging up your own sweet, earthy treasure? Picture this: golden-orange roots bursting from the soil, their sugary aroma promising pies, fries, and hearty stews. Now, here’s a secret: starting with slips, not seeds, is how most gardeners unlock this harvest.
Sweet potatoes aren’t just a superfood packed with vitamins A and C. They’re also forgiving crops that thrive in heat, store for months, and turn even small garden spaces into productivity hubs. But here’s the catch: success begins with sweet potato slips the tender green sprouts grown from a mature tuber. Unlike seeds, slips give your plants a head start, adapting faster to soil and weather.
This guide will walk you through planting sweet potato slips step by step, whether you’re a first-time gardener or a seasoned grower refining your technique. You’ll learn how to time planting perfectly, prep your soil for maximum yield, and nurture slips into a harvest that fills your pantry. Let’s turn that dream of homegrown sweetness into reality.
Key Takeaways
- Sweet potato slips are young plants grown from mature tubers, not seeds.
- Starting with slips boosts success rates, especially in shorter growing seasons.
- This guide simplifies the process for gardeners at any skill level.
Why Slips Outperform Seeds
Ever wondered why most gardeners skip seeds? Sweet potatoes grown from slips mature faster and resist disease better. Seeds can be finicky, requiring precise temperatures and longer growing windows. Slips, on the other hand, hit the ground running. In as little as 90 days, you could be harvesting your first tubers.
What’s Ahead
- When and where to plant slips for optimal growth.
- How to create the ideal soil environment.
- Simple care tips to avoid common pitfalls.
Let’s dig in.
Understanding Sweet Potato Slips (What They Are & Why They Matter)
What Are Sweet Potato Slips?
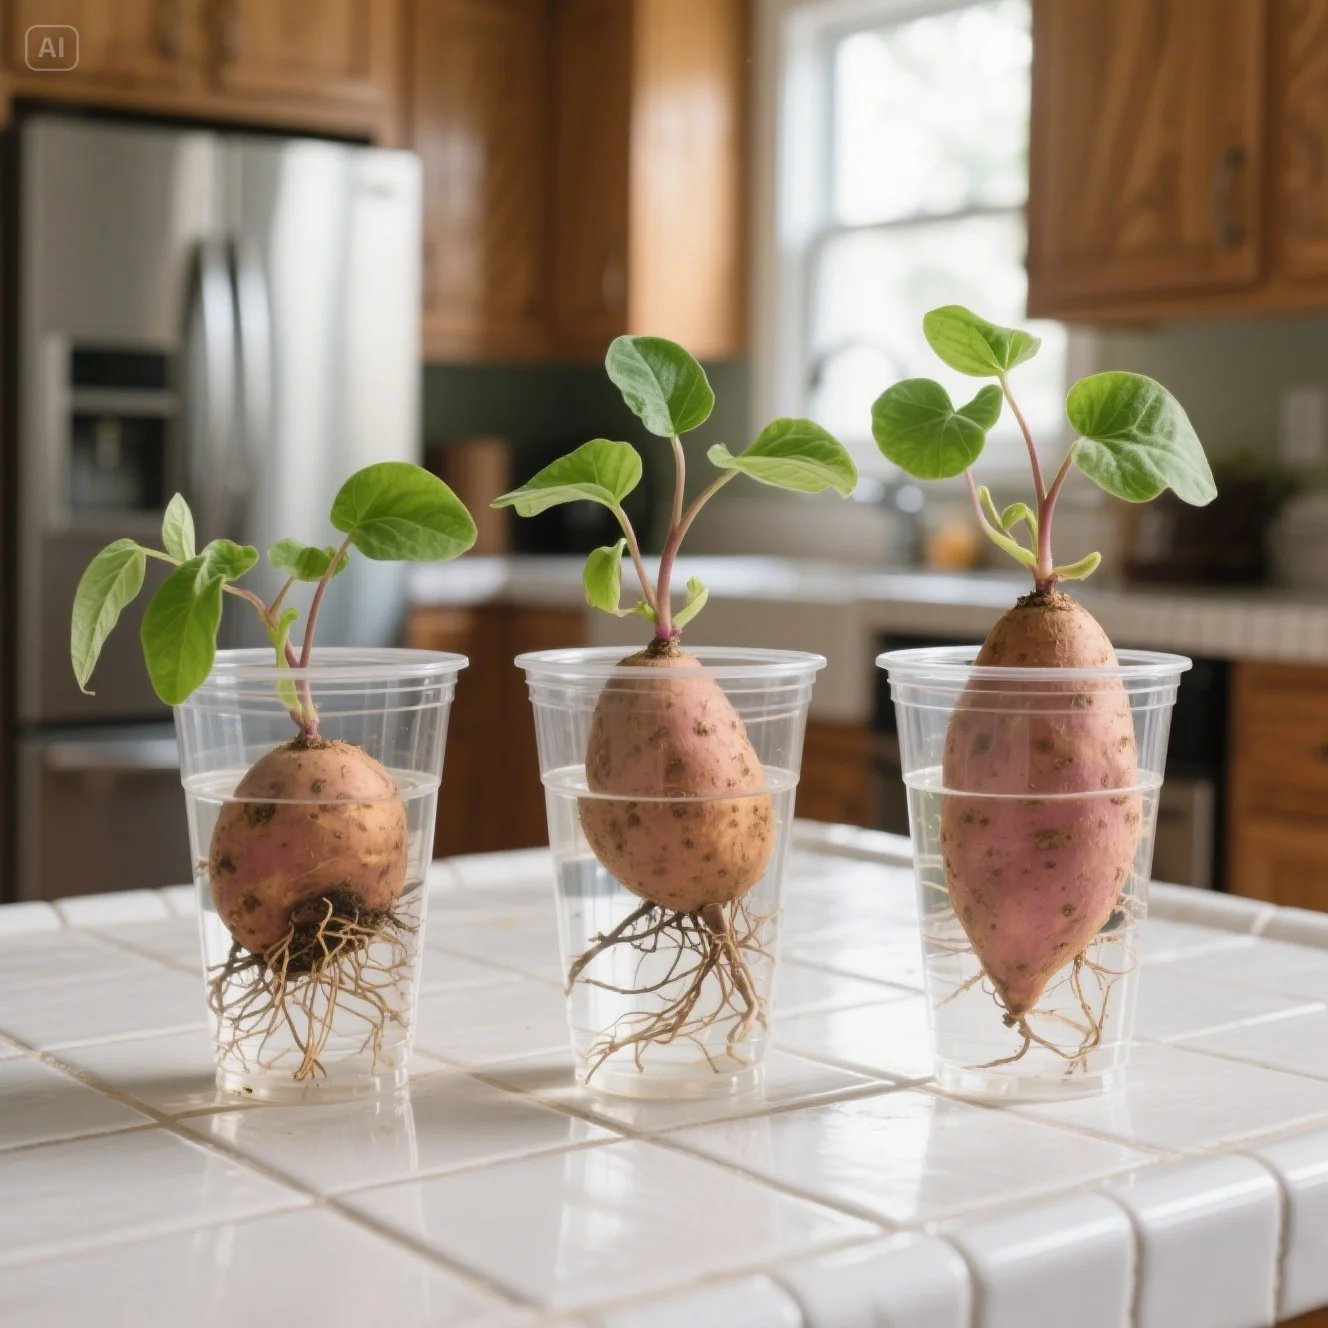
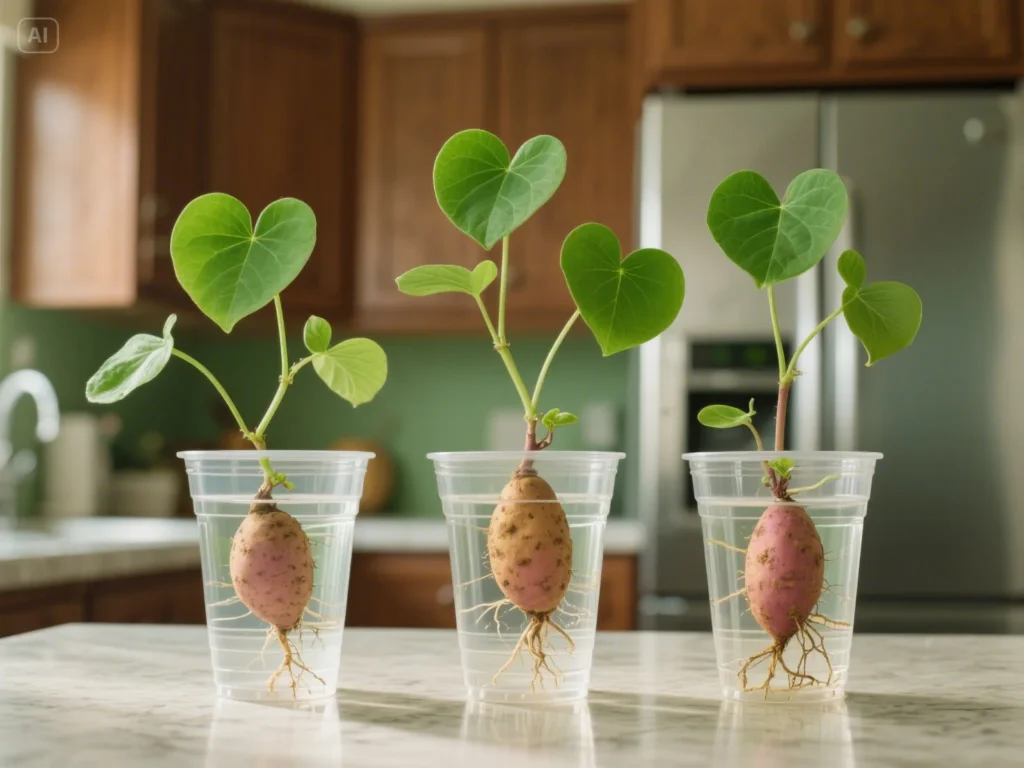
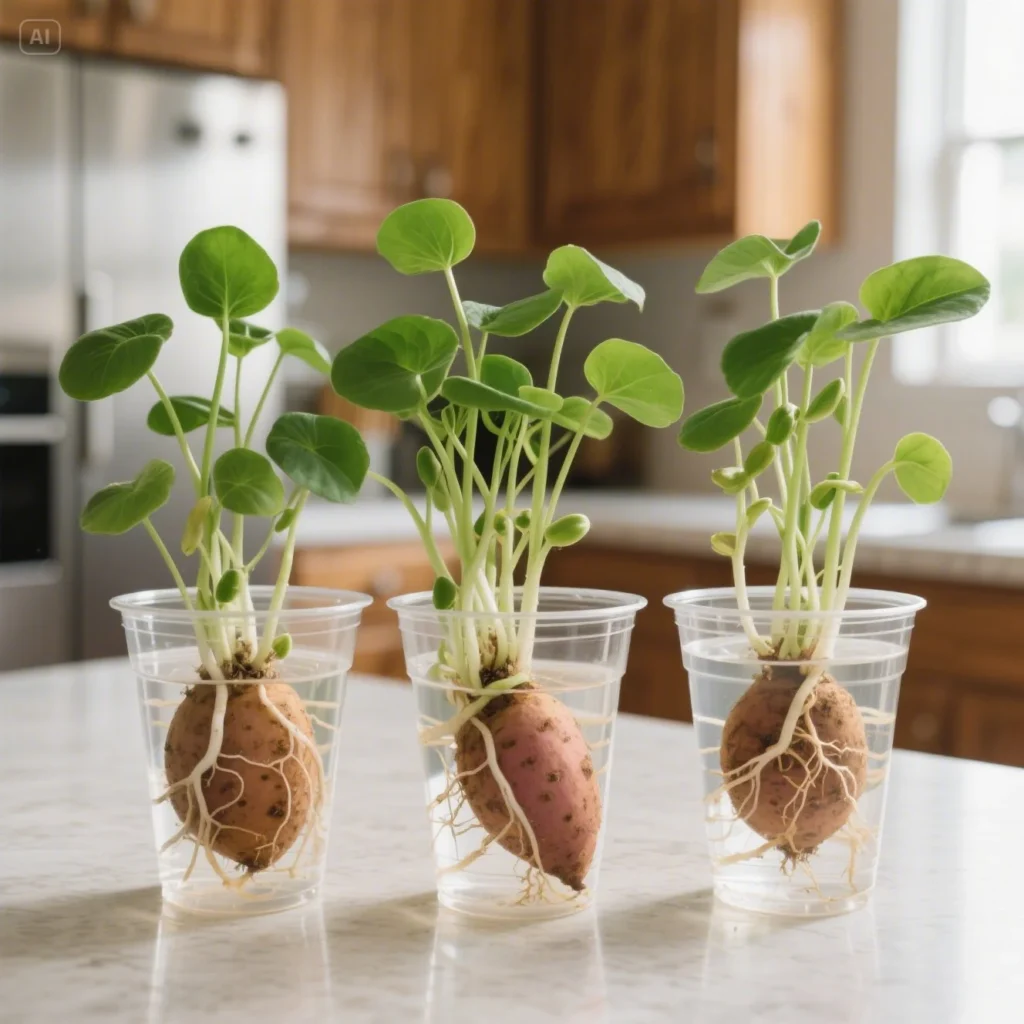
Sweet potato slips are young plants grown directly from a mature sweet potato. Picture slender green stems, 6–12 inches long, with a few delicate leaves at the tip and tiny roots emerging near the base. These sprouts are your ticket to growing sweet potatoes efficiently. Unlike seeds, slips skip the fragile germination phase, giving you a stronger, faster start.
How Slips Form
Place a sweet potato in warm, moist soil or water, and within weeks, sprouts (slips) will grow from its “eyes.” These slips are clones of the parent tuber, ensuring you’ll harvest the same variety. For a visual, search “sweet potato slips images” to see their leafy stems and threadlike roots.
Why Start with Slips Instead of Seeds?
Sweet potatoes rarely grow true to type from seeds, and seeds require a long, hot growing season often impractical in cooler climates. Here’s why slips win:
- Faster Results: Slips shave 4–6 weeks off your growing timeline.
- Climate Flexibility: They adapt better to variable weather than seeds.
- Disease Resistance: Slips from healthy tubers inherit the parent’s resilience.
- Variety Control: Want purple-skinned or extra-sweet types? Slips guarantee the same traits as the parent.
Where to Get Sweet Potato Slips
- Online Nurseries: Look for sellers with heat-resistant packaging and organic certifications (e.g., Burpee, Southern Exposure Seed Exchange).
- Local Garden Centers: Ask for slips suited to your USDA zone.
- DIY Option: Grow your own slips by sprouting store-bought organic tubers (Note: We’ll cover this in a future guide!).
Choosing Healthy Slips: A Checklist
Avoid disappointment by picking slips that show:
- Bright green leaves (no yellow spots or wilting).
- Firm stems (limp stems struggle to root).
- Visible root nubs (tiny white bumps signal readiness to grow).
- No pests (check for aphids or holes in leaves).
Pro Tip: If buying online, choose suppliers who ship slips in biodegradable pots—they reduce transplant shock.
Why Slips Outshine Seeds in Most Gardens
In regions with frost-free periods under 120 days, slips are non-negotiable. Seeds need steady warmth to sprout, while slips thrive once soil hits 60°F. Plus, slips let you grow heirloom varieties like ‘Beauregard’ or ‘Georgia Jet,’ which are rarely sold as seeds.
Key Takeaway: Starting with slips isn’t just easier it’s the key to growing sweet potatoes successfully in most backyards.
Next Up: Timing your planting perfectly to match your local climate.
Timing is Everything: When to Plant Sweet Potato Slips
Why Warm Weather Matters
Sweet potatoes love heat. These tropical natives thrive in temperatures between 70–90°F, and cold soil is their worst enemy. Planting too early can stunt growth, rot slips, or even kill young plants. Wait until both air and soil have warmed patience here pays off in bigger harvests.
The Risks of Rushing
- Cold soil (below 60°F) slows root growth.
- Frost damages leaves and stems, even if slips survive.
- Wet, chilly soil invites fungal diseases.
3 Signs It’s Time to Plant
- Soil Temperature Hits 60°F (15°C): Use a $10 soil thermometer. Check at 8 AM for three straight days.
- Frost-Free Forecast: Ensure no frost is predicted for at least two weeks.
- 4–6 Weeks After Last Frost: This gives soil time to warm fully.
Pro Tip: Spread black plastic over your garden bed 2–3 weeks before planting. It absorbs sunlight, warming soil faster.
Regional Timing Tips
- Southern States (Zones 8–10): Plant slips in mid-April to early May.
- Northern States (Zones 5–7): Wait until late May or early June.
- Coastal Areas: Cooler summers? Opt for short-season varieties like ‘Georgia Jet.’
Always Cross-Check: Contact your local agricultural extension office or search “[Your State] + sweet potato planting dates” for precise timing.
What If You Miss the Window?
Sweet potatoes need 90–120 frost-free days. If your growing season is short:
- Start slips indoors earlier.
- Use raised beds or containers to trap heat.
- Choose fast-maturing varieties.
Key Takeaways
- Plant slips only when soil stays above 60°F.
- Frost kills slips never gamble on late cold snaps.
- Adjust timing based on your USDA zone.
Next Up: How to prep your garden bed for the healthiest sweet potato crop.
Preparing Your Garden Bed for Sweet Potatoes (The Ideal Environment)

Choosing the Right Location
Full Sun is Non-Negotiable
Sweet potatoes need 6–8 hours of direct sunlight daily to fuel their growth. Less light means smaller tubers and leggy vines. Scout your garden for spots free from shade trees or structures.
Well-Drained Soil Saves Roots
These plants hate “wet feet.” Soggy soil causes root rot, turning tubers mushy. Avoid low-lying areas where water pools. If your soil is heavy clay, don’t panic, raised beds or slopes fix drainage issues.
Soil Prep in 4 Steps
- Loosen the Soil
Dig 8–10 inches deep with a garden fork. Break up clumps to create a crumbly texture roots expand easily in loose soil. - Mix in Organic Matter
Spread 2–3 inches of compost or aged manure over the bed. Work it into the top 6 inches. This boosts fertility, retains moisture, and improves drainage. - Test and Adjust pH
Sweet potatoes prefer slightly acidic soil (pH 5.5–6.5). Grab a $15 test kit from your garden center. Too alkaline? Add sulfur. Too acidic? Sprinkle lime. - Skip High-Nitrogen Fertilizers
Nitrogen fuels leafy vines, not tubers. Use a balanced fertilizer (e.g., 5-10-10) or stick to compost.
Hills vs. Rows: Which is Better?
Hilling Wins for Most Gardeners
Mound soil into hills 8–12 inches tall and 3 feet apart. Benefits include:
- Warmer soil (key for early growth).
- Better drainage during heavy rains.
- More space for tubers to swell.
Flat Rows Work Too
If you’re short on time, plant slips in rows 3 feet apart. Just ensure soil stays loose and well-drained.
Pro Tips for Problem Soils
- Clay Soil: Mix in coarse sand or peat moss to improve texture.
- Sandy Soil: Add extra compost to hold moisture.
- Weedy Areas: Lay cardboard under mulch to smother weeds before planting.
Key Takeaways
- Sunlight: 6–8 hours daily.
- Soil Texture: Loose, crumbly, and enriched with compost.
- pH Balance: Slightly acidic (5.5–6.5).
- Avoid Nitrogen Overload: Prioritize phosphorus and potassium for bigger tubers.
Next Up: The step-by-step guide to planting your slips for maximum yield.
The Step-by-Step Guide to Planting Sweet Potato Slips
Gather Your Supplies
You’ll need:
- Trowel or hand shovel: For digging small holes.
- Gardening gloves: Protect hands while handling slips.
- Watering can or hose: For gentle post-planting hydration.
- Measuring tape: Ensure proper spacing.
- Mulch (optional): Straw, shredded leaves, or grass clippings.
Pre-Planting Prep
- Hydrate Slips (Optional but Helpful)
Soak slip roots in lukewarm water for 1–2 hours before planting. This reduces transplant shock and kickstarts root growth.
Planting Steps
1. Dig Shallow Holes
Use your trowel to make holes 4–6 inches deep and 12–18 inches apart within rows. Space rows 3–4 feet apart to let vines sprawl.
2. Position Slips Correctly
- Lay each slip horizontally in the hole.
- Bury the stem up to the first set of leaves (this encourages more root nodes).
- Avoid bending or breaking stems.
3. Firm the Soil
Gently press soil around the base to eliminate air pockets. Don’t compact it—roots need loose soil to expand.
4. Water Immediately
Soak the soil until it’s moist 6 inches deep. Use a gentle spray to avoid dislodging slips.
Why Spacing Matters
Sweet potato vines spread up to 10 feet! Crowded plants compete for sunlight and nutrients, leading to smaller tubers. Follow these spacing rules:
- In rows: 12–18 inches apart.
- Between rows: 3–4 feet apart.
Mulching for Success
After watering, spread 2–3 inches of mulch around slips (but not touching stems). Benefits include:
- Weed suppression: Fewer weeds mean less competition.
- Moisture retention: Reduces watering frequency.
- Soil warmth: Mulch traps heat, which sweet potatoes love.
Best Mulches: Straw, dried leaves, or black plastic (for extra warmth).
Pro Tips for Delicate Slips
- Handle by the leaves: Avoid gripping stems, which bruise easily.
- Plant on cloudy days: Reduces stress from direct sun.
- Use a stick for support: Prop up limp slips with a small stake until roots establish.
Troubleshooting Common Mistakes
- Slips wilt after planting: Water deeply and shade them for 1–2 days.
- Holes too deep: Shallow planting ensures stems don’t rot.
- Overcrowding: If vines overlap later, prune a few leaves for airflow.
Key Takeaways
- Soak slips to ease transplant shock.
- Bury stems up to the first leaves.
- Water thoroughly and mulch immediately.
- Give vines room to stretch.
Next Up: How to care for your slips as they grow into vigorous, tuber-producing plants.
Caring for Your Newly Planted Sweet Potato Slips (Ensuring Success)
Watering: Keep Roots Happy, Not Soggy
Sweet potatoes thrive on consistent moisture, especially during their first 2–3 weeks as roots establish. Here’s how to get it right:
- Weeks 1–3: Water every 2–3 days if rain is scarce. Aim for 1 inch of water weekly.
- Check Soil Moisture: Stick your finger 2 inches deep. If it’s dry, water deeply at the base of plants.
- After Establishment (4+ weeks): Reduce to weekly watering unless conditions are hot and dry. Overwatering now can split tubers.
Pro Tip: Use a soaker hose to deliver water directly to roots, avoiding wet leaves that attract pests.
Weed Control: Stay Ahead of Competitors
Weeds steal nutrients and water, so tackle them early:
- Mulch: Maintain 2–3 inches of straw or leaves around plants to suppress weeds.
- Hand-Pull Carefully: Gently remove weeds near slips to avoid disturbing shallow roots.
- Avoid Hoes: Deep digging can damage developing tubers.
Fertilizing: Less is More
If you prepped soil with compost, skip fertilizer. If growth stalls:
- Use Low-Nitrogen Options: Try a 5-10-10 mix to boost tubers, not leaves.
- When to Apply: Side-dress plants 4–6 weeks after planting if needed.
Never Use High-Nitrogen Fertilizers: They create lush vines but tiny tubers.
Pest and Disease Monitoring: Quick Checks Save Crops
Sweet potatoes are tough but watch for:
- Sweet Potato Weevils: Small beetles that bore into tubers. Remove infected plants.
- Root Rot: Caused by soggy soil. Improve drainage if leaves yellow suddenly.
- Fungal Spots: Treat with neem oil if leaf spots appear.
Act Fast: Isolate affected plants and research organic fixes specific to your issue.
Training Vines: Optional but Neat
Let vines sprawl naturally, or:
- Guide Them: Gently direct vines toward open space using sticks or lightweight trellises.
- Trim Excess: Prune overcrowded areas to improve airflow and sunlight.
Key Takeaways
- Water Deeply Early, Then Ease Up: Consistency prevents stress but avoid waterlogging.
- Mulch is Your Ally: It blocks weeds and locks in moisture.
- Skip the Heavy Feeding: Sweet potatoes prefer lean soil.
- Inspect Weekly: Catch pests or diseases before they spread.
Next Up: Learn when and how to harvest your sweet potatoes for peak flavor and storage life.
Anticipating the Harvest (When and How to Know)
Time to Maturity: Patience Pays Off
Most sweet potato varieties take 90–120 days to mature. Fast-growing types like ‘Georgia Jet’ can be ready in 90 days, while heirlooms like ‘Japanese Purple’ may need 120+ days. Your planting date and summer weather play big roles cool summers slow growth, while heat accelerates it.
Pro Tip: Mark your calendar 3–4 months after planting slips. Start checking for readiness weekly once you hit the 90-day mark.
3 Signs Your Sweet Potatoes Are Ready
- Vines Yellow and Wilt: Leaves lose their bright green color, and stems begin to dry out. This signals the plant is shifting energy to the tubers.
- Soil Cracks Near the Base: Look for small fissures around the plant a telltale sign tubers are expanding underground.
- Skin Resists Scratching: Gently rub a tuber’s surface with your thumb. Mature skins stay firm; immature ones scratch easily.
The Optional Test Dig
Unsure if they’re ready? Try this:
- Choose One Plant: Pick a slip from the center of your bed (avoid edges, where tubers may be smaller).
- Dig Carefully: Use your hands or a garden fork 8–10 inches away from the stem. Lift soil gently to expose a few tubers.
- Check Size: Mature sweet potatoes are typically 2–3 inches thick and 5–8 inches long, depending on the variety.
If They’re Too Small: Cover the roots with soil and wait 1–2 weeks.
What If Frost Threatens Early?
If frost is forecast before day 90:
- Harvest Immediately: Even small tubers are edible, though less sweet.
- Cover Plants: Use frost blankets overnight to buy a few extra days.
Key Takeaways
- Most varieties need 3–4 months to mature.
- Yellow vines and cracked soil are nature’s “harvest now” alerts.
- Test digs prevent premature harvesting.
Next Up: How to harvest, cure, and store your sweet potatoes for maximum flavor and shelf life.
Conclusion (Recap and Call to Action)
Your Sweet Potato Journey Starts Here
Planting sweet potato slips isn’t just about growing food it’s about cultivating patience, joy, and a deeper connection to your garden. Let’s recap the essentials:
- Start with Healthy Slips: Choose vibrant sprouts to ensure strong roots.
- Time It Right: Wait for warm soil and frost-free days.
- Prep Smart: Loose, well-drained soil and full sun are non-negotiable.
- Plant with Care: Space slips properly, water deeply, and mulch generously.
- Nurture Thoughtfully: Balance watering, weed control, and pest checks.
Why It’s Worth the Effort
Imagine roasting homegrown sweet potatoes this winter, with their caramelized edges, creamy centers, and the pride of saying, “I grew these.” Whether mashed, baked, or spiralized, your harvest will taste sweeter because you nurtured it from slip to table.
Let’s Grow Together
- Share Your Story: Did your first slip thrive? Hit a snag? Tell us in the comments!
- Recipe Swap: “What’s your favorite way to cook sweet potatoes?” Share your go-to dish below!
Your Next Steps
- Plan Your Patch: Sketch a sunny garden spot or pick containers for patio growing.
- Spread the Knowledge: Tag a friend who’d love growing sweet potatoes and share this guide.
Final Thought
Gardening teaches us that small, consistent efforts bloom into something extraordinary. Those humble slips? They’re not just plants they’re a reminder that growth happens when we create the right conditions and trust the process.
Now grab those slips, dig into the dirt, and let your garden surprise you. Happy planting!
Explore More:
FAQs
Can I plant store-bought sweet potatoes?
Yes, but choose organic sweet potatoes non-organic ones are often treated with sprout inhibitors. To grow slips, place the tuber in water or soil and wait for sprouts. Note: Store-bought varieties may not thrive in all climates.
Why are my slips wilting after planting?
Wilting is normal for 1–2 days post-transplant (transplant shock). If wilting persists:
Water deeply but avoid soggy soil.
Shade slips temporarily with a cloth or cardboard during peak sun.
Ensure soil is above 60°F cold roots struggle to absorb water.
Can sweet potatoes grow in containers?
Absolutely! Use a 15–20-gallon pot with drainage holes. Fill with loose, sandy soil mixed with compost. Plant 1–2 slips per container and place in full sun. Water when the top 2 inches of soil dry out.
How do I know if I overwatered my plants?
Signs of overwatering:
Yellow leaves that feel soggy.
Mushy stems near the soil.
Foul odor from roots (indicates rot).
Fix: Let soil dry completely before watering again. Improve drainage with raised beds or sand.
What pests attack sweet potatoes?
Watch for:
Sweet potato weevils (tiny beetles): Remove infected plants.
Aphids: Spray with water or neem oil.
Rodents: Use hardware cloth around beds to protect tubers.
How long until I can harvest?
Most varieties take 90–120 days. Check for maturity signs:
Yellowing vines.
Cracked soil around the base.
Tubers 2+ inches thick (test-dig one plant).
Can I grow slips indoors year-round?
Yes! Start slips 8–10 weeks before your last frost date. Use a sunny windowsill or grow lights. Transplant outdoors once soil warms.
Why are my plants all vines and no tubers?
Likely causes:
Excess nitrogen (avoid high-nitrogen fertilizers).
Shallow soil (tubers need 8+ inches of loose soil).
Overcrowding (space slips 12–18 inches apart).
Can I eat sweet potato leaves?
Yes! Young leaves are edible and nutritious. Sauté them like spinach or add to salads. Avoid overharvesting leave enough leaves to feed the plant.
How should I store my harvest?
Cure tubers first: Keep them at 80–85°F and 85–90% humidity for 10–14 days. Then store in a cool (55–60°F), dark place. Properly cured sweet potatoes last 6–12 months.